


Home / Blog Center / Chargers / Key Considerations When Installing a New Floor Drain: An Expert's Guide
Key Considerations When Installing a New Floor Drain: An Expert's Guide
11/02/2025 | Hawkrown
The floor drain is a common fixture in home bathrooms, used to remove wastewater and prevent backflow. However, over time and with wear and tear, old floor drains may develop leakage issues. Here’s what to pay attention to when replacing an old floor drain with a new one.
What to Watch Out for When Upgrading Your Floor Drain
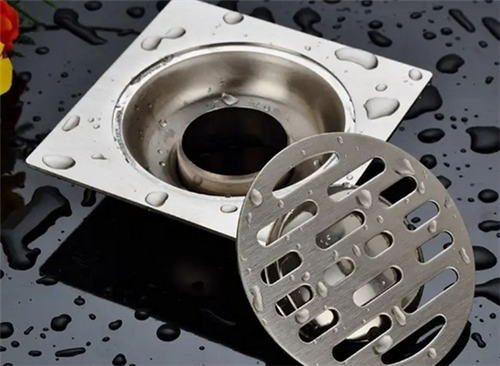
1. Choosing the Right Type and Size of Floor Drain
Before replacing the old floor drain, it is essential to determine the type and size of the floor drain. Common types include odor-proof, dry trap, and water trap floor drains. Different types of floor drains are suitable for different bathroom environments and usage needs. The size of the drain is also a critical factor, and typically, the standard outlet diameter for floor drains is 50mm. Therefore, when replacing the old floor drain, make sure to select a suitable type and size to meet the bathroom's requirements.

2. Measuring and Preparing the Installation Space
Before replacing the old floor drain, measurements need to be taken to ensure that the installation space for the new drain meets the requirements. Start by measuring the size of the existing drain and consider whether the new drain will match. Next, check the levelness and stability of the floor where the drain is located to ensure it can withstand the installation and use of the new drain. If necessary, clean and adjust the installation space to facilitate a smooth replacement of the floor drain.

3. Closing Valves and Draining the Water Pipes
Before replacing the floor drain, shut off the relevant valves in the bathroom and drain the water pipes. First, close the valve connected to the floor drain to prevent backflow of wastewater. Then, turn off the faucets in the bathroom and drain the water from the pipes. This precaution helps prevent excessive water flow during the replacement, reducing the risks of flooding and slippery conditions.
4. Removing the Old Floor Drain
Care must be taken when removing the old floor drain. Use tools such as wrenches or screwdrivers based on the type of floor drain to carefully disassemble it. For example, odor-proof floor drains often have snap-on mechanisms, so look for the position of the clips and gently detach them. Water trap floor drains may have screws that need to be unscrewed before removing the drain. Avoid pulling forcefully when removing the old drain to prevent damaging the floor and associated piping.
5. Installing the New Floor Drain
When installing the new floor drain, follow the appropriate steps. First, place the new drain in the installation position, ensuring it seals with the drainage outlet. Next, install according to the type of drain, following the instructions or guidelines provided. For instance, for a water trap floor drain, place the waterproof gasket on the drain and secure it with screws. Finally, ensure that the drain is firmly installed and perform a test to confirm that drainage is smooth.

In summary:when replacing an old floor drain, several aspects must be considered: choosing the appropriate type and size of the drain, preparing the installation space, closing valves and draining pipes, removing the old drain, installing the new drain, sealing against leaks, and regular cleaning and maintenance. Properly replacing the floor drain can ensure a better bathroom experience and safety, extending the lifespan of the drain.
