


Home / Blog Center / Chargers / How to Replace a Water Dispenser Faucet: A Step-by-Step Guide
How to Replace a Water Dispenser Faucet: A Step-by-Step Guide
17/01/2025 | Hawkrown
Due to the increasing severity of water pollution, many households are installing water dispensers. If a malfunction occurs during use, the following guide will introduce how to change the tap of a water dispenser.
How to Change the Tap of a Water Dispenser
1. First, disconnect the power supply.
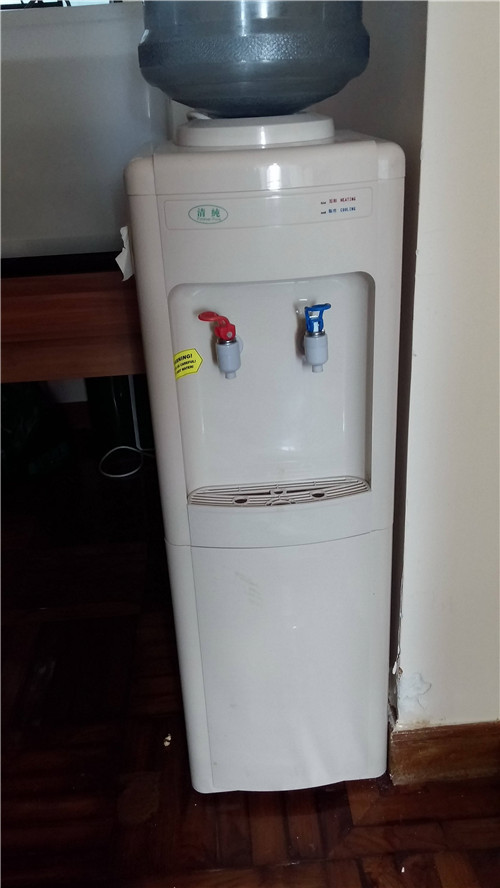
2. Remove the water bottle from the dispenser or drain the remaining water inside.
3. Unscrew the screws on the back cover and open it.
4. After unscrewing the nut on the tap, pull it outward to remove the tap.
5. Install the new tap by following the reverse of the disassembly process.
Things to Pay Attention to When Using a Water Dispenser
1. If your water dispenser will not be used for a long time, remember to unplug the power supply and drain any excess water from the drainage outlet.
2. When cleaning the water dispenser, do not use solvents like gasoline to wipe the machine, and do not directly spray water onto the machine’s body.
3. Additionally, regularly clean any dirt inside the water dispenser.
4. If you are using a refrigeration model, once the temperature controller is set, do not adjust it arbitrarily. You need to turn off the refrigeration switch, wait for 3 minutes, and then turn it back on. When moving the dispenser, do not tilt it beyond 45 degrees to prevent damage to the machine or accidents.

5. It is important to note that water dispensers with ozone disinfection are designed for normal temperature, and food should not be stored for long periods. You may place items such as tea sets or mugs, but long-term food storage is not recommended.
6. Make sure to place the water dispenser in a cool and dry area, and protect it from direct sunlight.
In summary, this guide provides information on how to change the tap of a water dispenser. You can follow the steps above to perform the replacement while paying special attention to certain details to avoid unnecessary complications. For installation, simply reverse the steps used for disassembly.
