


Home / Blog Center / Chargers / How to Install a Shower Booster Pump
How to Install a Shower Booster Pump
17/12/2024 | Hawkrown
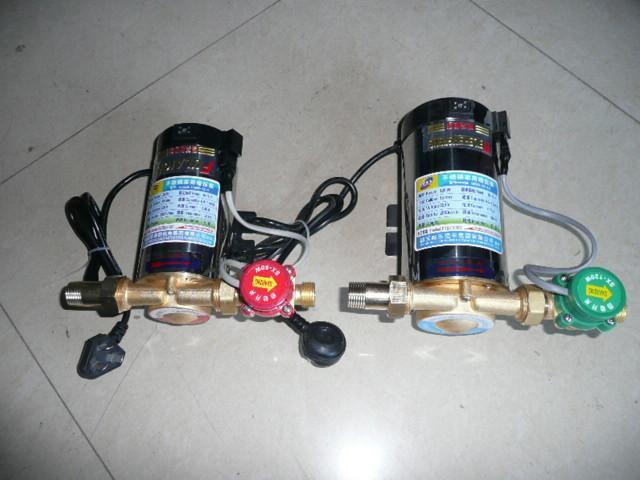
First, check that all the parts of the pump are intact, screws are tightened, and there are no foreign objects inside, ensuring the entire passage is clear. Then determine the installation location for the pump, identify the water inlet and outlet, and make sure to install it according to the direction of the pump's arrow. Place it on a level surface and wrap a few layers of sealing tape around the water inlet before attaching the connector.
Use a wrench to tighten the connector, and then repeat the same process for the outlet. Connect the shower switch wiring to the pump's wiring. Connect the water inlet to the tap water supply using a flexible hose, and also connect the pump’s outlet to the shower head's water inlet with a flexible hose. After that, power up the booster pump to ensure it runs correctly.
Installation Considerations for Booster Pumps
1. When installing a booster pump, it is advisable to add an additional valve in the household plumbing to simplify future maintenance checks. Installing a pressure gauge at the outlet will also provide a clearer understanding of the pump's flow rate, which helps extend its lifespan. In case of any issues, timely repairs can be made.
2. It is important to follow the correct sequence during installation. A check valve should be installed, and a tee fitting should be connected at the outlet. Ensure all connections between the pipes are secure to prevent looseness. Any leaks can affect the pipe pressure, causing the booster pump to leak before it receives water.
3. To ensure safety in electrical usage, it is necessary to connect to a ground wire, so choose a three-pronged safety socket with a grounding device.
In summary:the above guidelines explain how to install a booster pump for a shower water pipe. Additionally, remember to install a pressure gauge and a check valve, and ensure grounding for electrical safety.
